
navigation:
|
|
|
| Introduction: | |
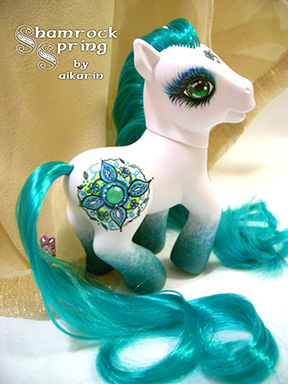
| Many
real-life horses have darker muzzles, ears, and legs. These
extremities are known as the "points". So, it was only a
matter of time before pony customizers caught on. With a little
patience, anyone can make a pony with contrasting gradient points.
Best of all, they look harder to create than they actually are!
Gradient custom ponies
became so immensely popular that even Hasbro followed suit and made ponies
with gradient hooves - the 2006 Crystal Princess ponies! ^_^ |
|
| Supplies needed: | |
|
|
|
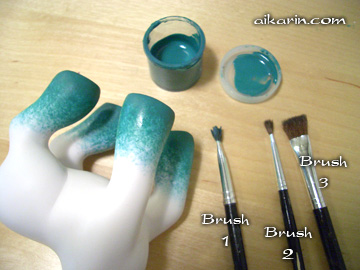
| Prepped
bait pony - I'm using a 3rd gen pony that has been scrubbed in this
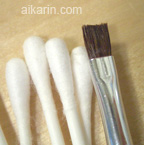
case. Short, soft bristle brushes - start with brushes that are 100% dry. I prefer flats. Brush #1 has the most paint - just a tad at the tips. Brush #2 has even less paint. Brush #3 feels completely dry and it's wider. No need to use very fancy brushes here...just something that feels soft is okay. The dabbing motion will quickly ruin fine pointed brushes. Cotton swabs - for blending Palette - here the plastic palette holds water and paint Acrylic paint - the paint is just a little thicker than what I use for solid body painting and it's freshly mixed. Make sure that you have enough paint for all of the gradient areas! |
|
| Instructions: | |
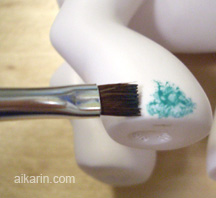
| 1.
Initial painting Use brush #1 and dab just the very tips into the paint. Dry it slightly on the palette, then dab the paint onto the pony. |
 |
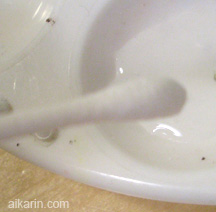
| 2.
Blending out Use brush #2 or #3 to blend out the color. This brush should be clean & 100% dry before you start. |
 |
| 3.
Dampening cotton swab Dip the end of a cotton swab in some clean water. |
 |
| 4.
Wring out cotton swab Use your fingers and squeeze out the excess water. The cotton swab should be barely damp. |
 |
| 5.
Blend with cotton swab Using the cotton swab, GENTLY blend the paint in using a circular motion. Use a light touch...you don't need a lot of downward pressure. |
 |
| **
For each layer: repeat steps 1 - 5 **
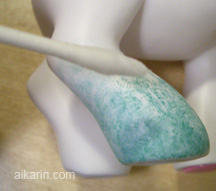
Here's what it looks
like after just a few layers. If you want it darker, use more
layers. |
 |
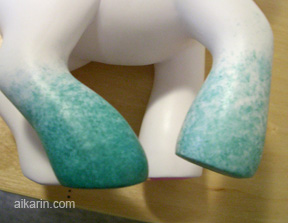
| After more layers and more blending. |  |
| Starting
on another leg. You can see the difference - the front leg has fewer
layers.
Also, if you want a smoother gradient, use more layers. |
 |
|
|
|
| A Link?: | |
|
|
|


Return to Custom Tips & Tutorials Page